


Gauge Mode
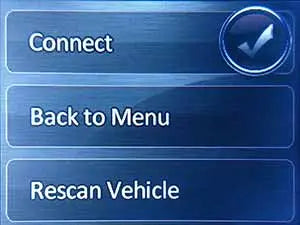
Getting into gauge mode is easy, plug the nGauge into the OBDII port, then start the vehicle.


-nGauge is checking your vehicle for every possible parameter.
-Also checking if “Auto-Power OFF” function is available.
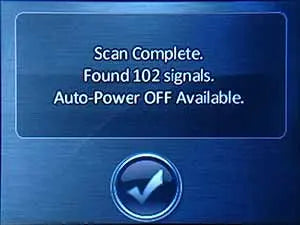
- Most 2011 and up Fords will have 100 or more.
-"Auto-Power Off" gives the nGauge the ability to automatically shut off based on whether the vehicle’s ignition is turned on or off. Most 2011+ Fords are compatible.


Overview of nGauge Monitoring Screens
-We suggest grouping items that are relevant to each other. Ignore what is displayed on screen in this image, as it is just the default set of parameters that display for a 2012 F150 5.0
-We suggest grouping items that are relevant to each other. Ignore what is displayed on screen in this image, as it is just the default set of parameters that display for a 2012 F150 5.0

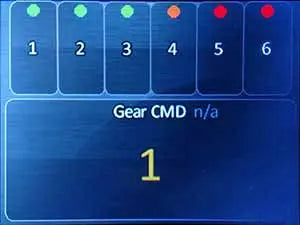
Screen 3 – The 6-LED warning light configuration
-On screen 3, you can customize how you want the 6-LED warning light to function.
-CLICK HERE FOR DETAILED INSTRUCTIONS
-The main gauge can be set as Boost, Load, or RPM. The smaller, secondary gauge can be set for AFR, Boost, Load, knock, temperatures of your choosing, etc.
How to Set Favorites and Record a Datalog

- Selecting Items to Datalog -
-Parameters to record in a datalog are chosen in two specific places-
1) Each parameter displayed in an on-screen gauge will be recorded
2) In the parameter selection screen, each "Favorite" you select will be recorded.

- Favorites -
-Favorited parameters designate what will be recorded in datalogs.
-To select a "Favorite", just tap the gold/yellow star in the upper-left corner of the parameter selection screen.
-When recording a datalog, parameters displayed in gauges and parameters set to "Favorites" will be recorded.

-To record a datalog, just tap the gauge screen and select "Start Log"
-While recording the log, the screen will display a grey circle with a red square.
-To end the datalog, just tap the red square and the log will be automatically saved and given a name.
6-LED Warning Light Configuration


6-LED Warning Light Examples
The PID can be set to Gear CMD so that each LED light will be representative of the gear you are in. This can be useful in an Automatic so you are aware of what gear you are currently in.
Set to Load, the 6 LED lights will be assigned automatically to display 100% divided by 6. This is good for Naturally Aspirated Vehicles, but on a boosted vehicle, especially the Ecoboost, you will want to divide 200% by 6 and assign each LED so that you can accurately gauge the higher-load situations that a boosted engine will be under at WOT.

By Selecting Knock, you can set the 6 LED lights to step up to the next light every degree of timing that is retarded. This can be set from 1 through 6, that way the first 3 degrees correspond with the green light, alerting you to keep an eye on it. Then, when it hits 4, 5 or 6, it turns yellow, then red, indicating that you are experiencing a probable knock even and that it should be datalogged.
ECT can be monitored here as well. We like to get operating temp so that it sits on the top-middle green LED light. The first two gree lights can then be set to appropriate values depending on the vehicle or what you want to see. We went with 100 and 120.